1 Getting Started
System Requirements
Minimum
- Windows 10 (64-bit)
- CPU: Intel i5 / AMD Ryzen 5
- RAM: 8 GB
- Storage: 2 GB
- GPU: Integrated graphics
Recommended
- Windows 10/11 (64-bit)
- CPU: Intel i7 / AMD Ryzen 7
- RAM: 16 GB
- Storage: 5 GB+ SSD
- GPU: NVIDIA GTX 1060+ (NVENC)
NVIDIA GPU(GTX 1060 이상)가 있으면 하드웨어 인코딩(NVENC)으로 렌더링 속도가 5~10배 빨라집니다.
Installation
- lunawaveapp.com/download에서 최신 버전 다운로드
- 다운로드한 LUNA WAVE Setup x.x.x.exe 실행
- 설치 완료 후 앱이 자동 실행됩니다
- 계정 로그인 또는 회원가입 후 사용 시작
앱은 자동 업데이트를 지원합니다. 새 버전이 있으면 시작 시 자동으로 업데이트됩니다.
2 Interface
LunaWave의 메인 화면은 상단 탭으로 구성되어 있습니다. 각 탭에서 AI 가사 생성, 곡 관리, 자동 러너, 비디오 편집 등 모든 기능에 접근할 수 있습니다.
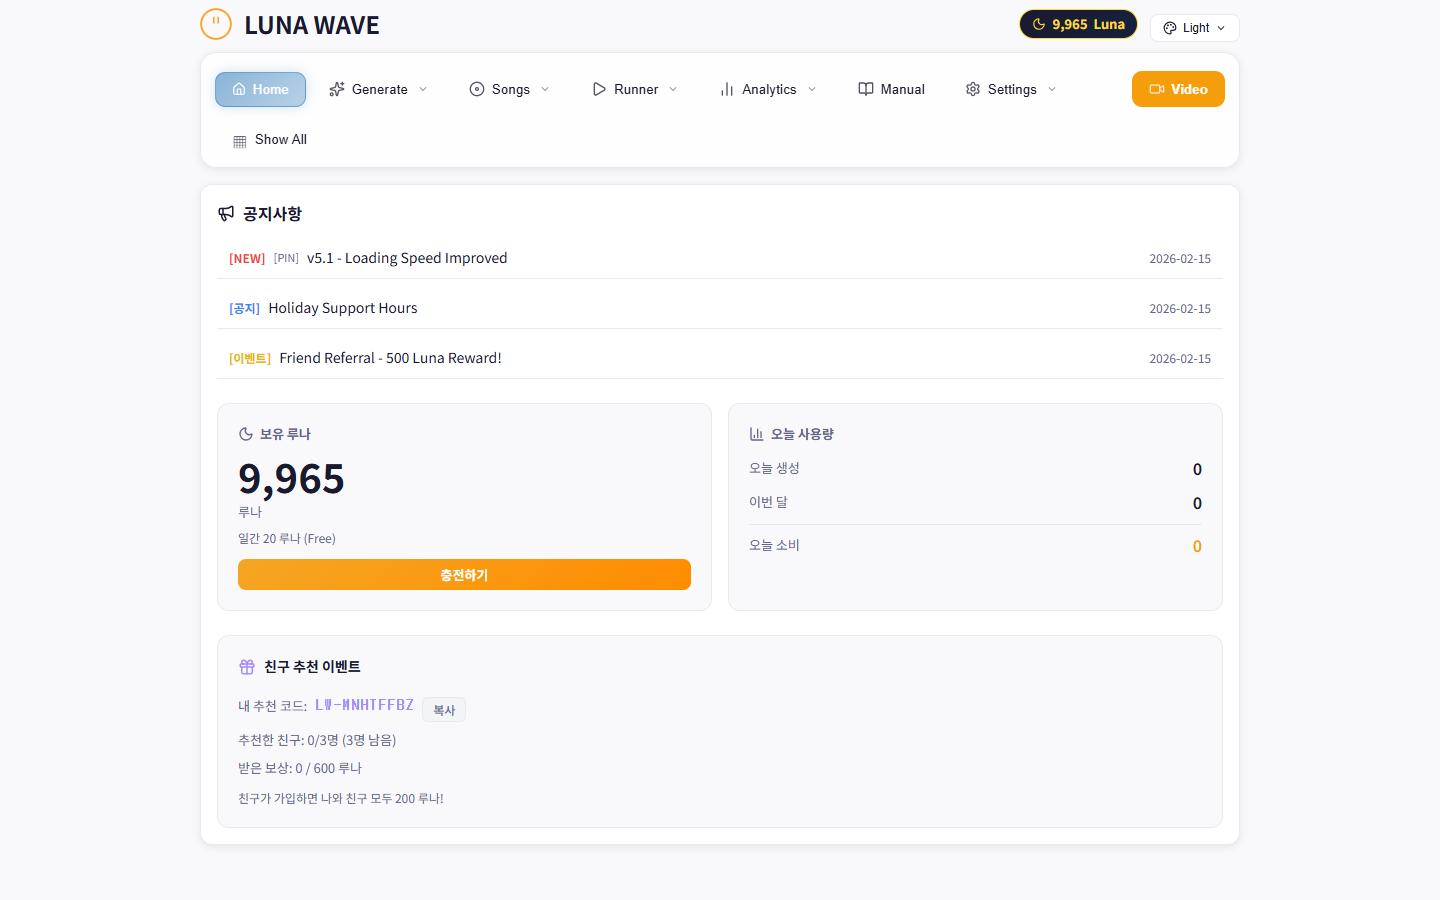
LunaWave Main Interface - Tab Navigation
Tab Structure
- Generate - AI 기반 가사 자동 생성
- Songs - 생성된 곡 목록 관리
- Runner - Suno AI 자동 입력 러너
- Suno - Suno 곡 다운로드
- YouTube - YouTube 메타데이터 생성
- Video - Engine2 비디오 빌더 (별도 창)
- Analytics - 채널 분석
- Settings - 앱 설정
테마는 Light / Dark 모드를 지원합니다. Settings에서 변경하거나, 상단 바의 테마 버튼으로 전환하세요.
3 Engine2 Video Builder
Engine2는 음악 비주얼라이저 영상을 제작하는 핵심 모듈입니다. 오디오 파일과 이미지를 업로드하고, 비주얼라이저, 텍스트, 자막, 컷아웃 효과를 적용하여 전문적인 뮤직 비디오를 만들 수 있습니다.
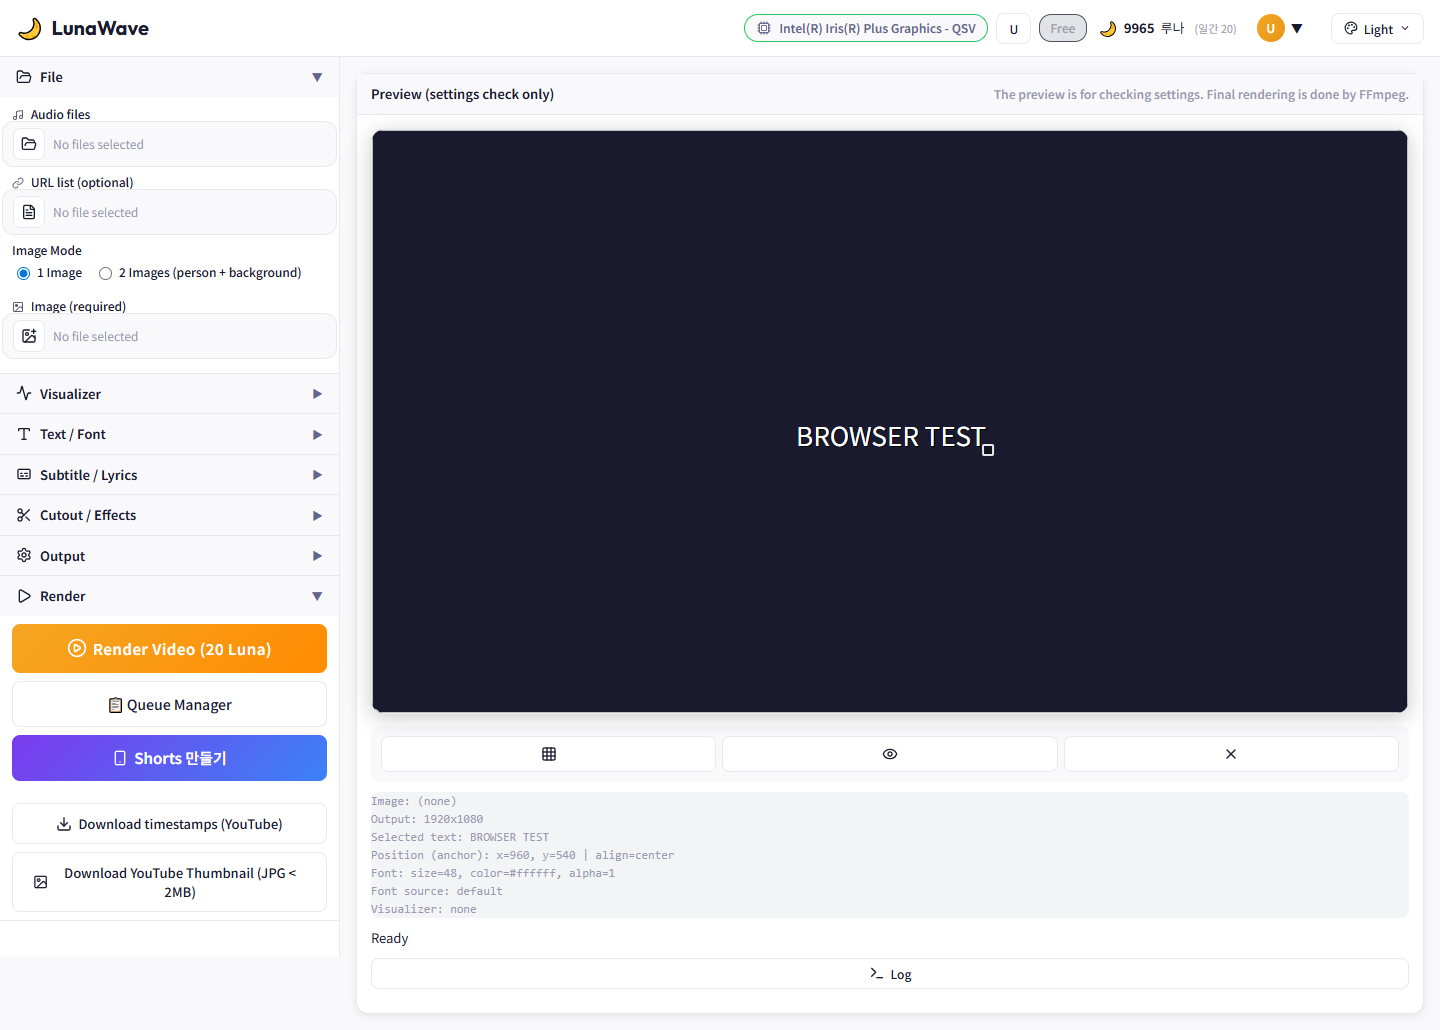
Engine2 Full Screen Layout
Layout Overview
- Left Panel: File, Visualizer, Text/Font, Subtitle, Cutout, Output, Render section (accordion)
- Center Area: Preview canvas, meta info, status, log
- Each accordion header toggles the section open/close
Left panel sections are arranged in workflow order from top to bottom: File → Visualizer → Text → Cutout → Output → Render
3.1 Top Bar
Engine2 Top Bar
- LunaWave Logo: Click to return to the main page
- GPU Badge: Shows detected GPU name
- Luna Balance: Shows current Luna points balance
- Theme Button: Toggle between Light/Dark mode
3.2 File Upload
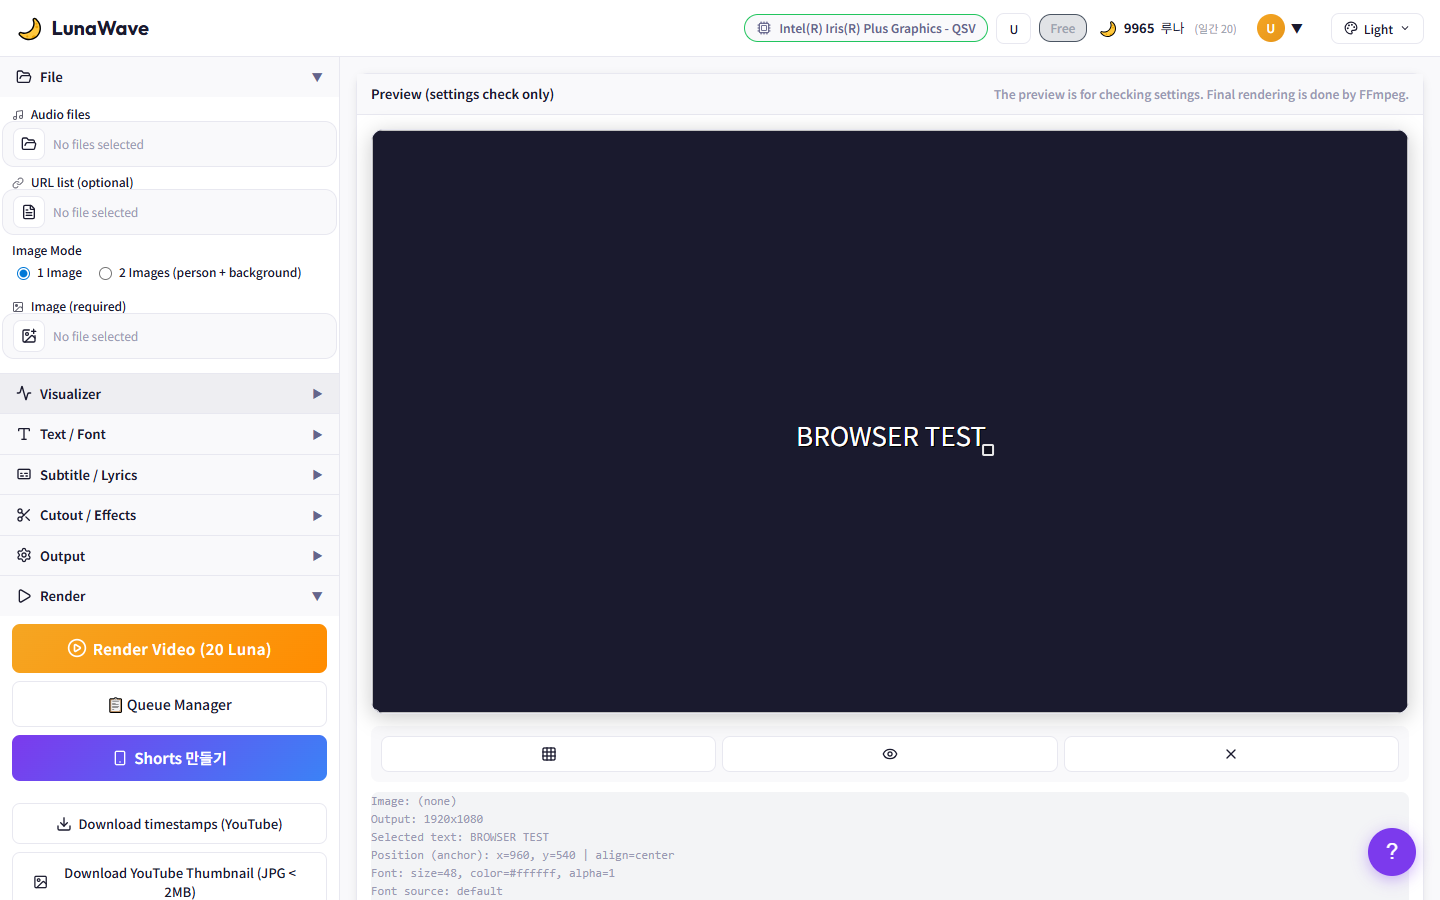
File Upload Section
- Audio files: Select audio files (MP3, WAV, FLAC, etc.). Multiple tracks auto-concatenate
- URL list: Upload a text file with YouTube URLs for batch download
- Image Mode: "1 Image" for single background, "2 Images" for separate person + background
- Image (required): Select background image. PNG, JPG, WEBP supported
Text Behind Person or Cutout requires an image with a person in it.
Both audio and image must be uploaded before rendering is possible.
3.3 Visualizer
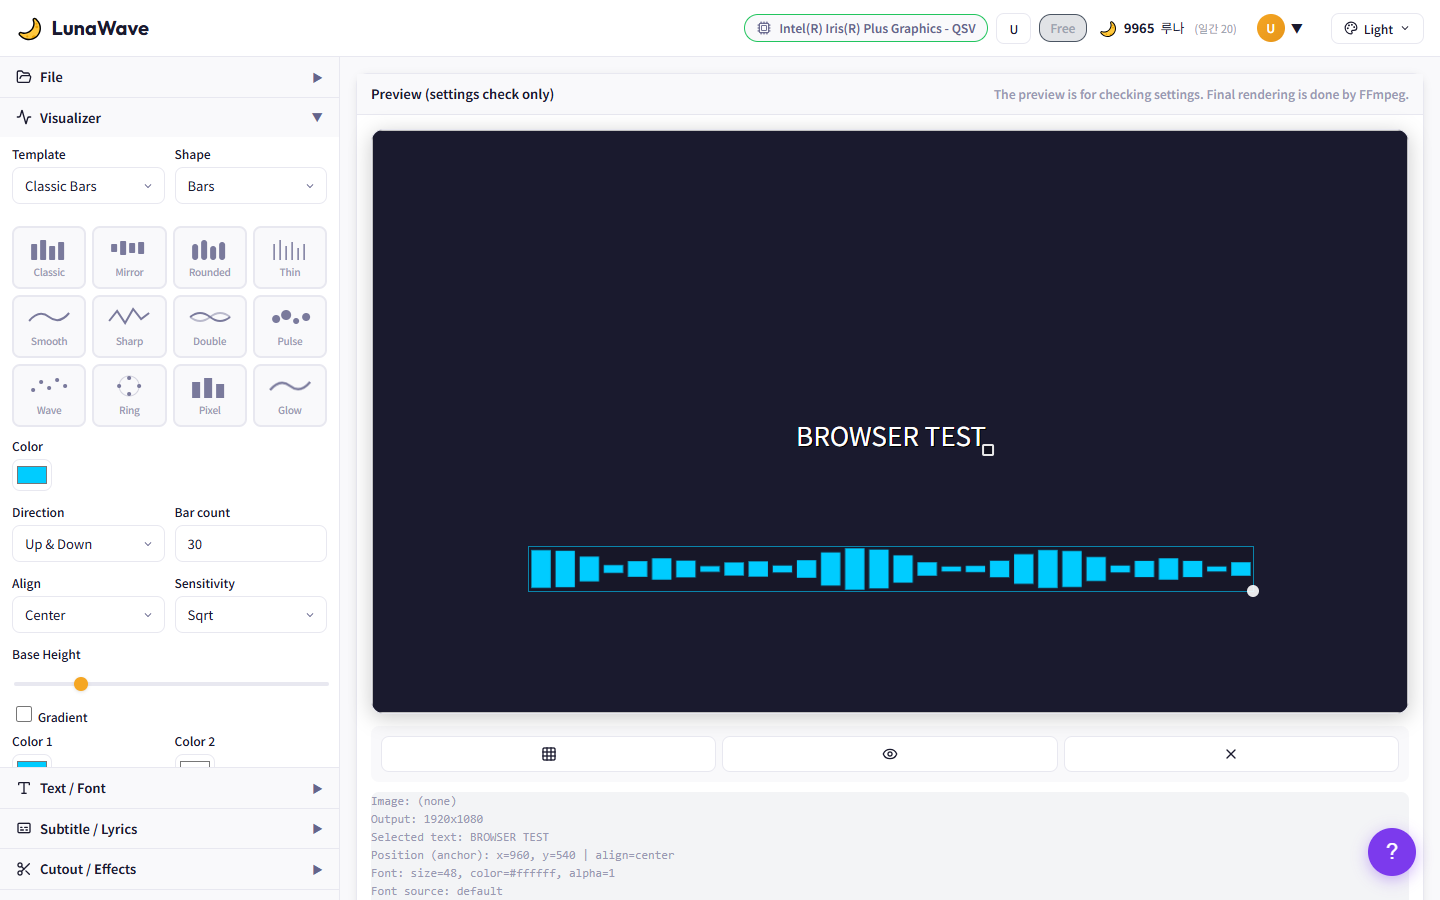
Visualizer Settings
- Template/Shape: Choose from Bars, Line Wave, Dots
- Preset Grid: 12 presets (Classic, Mirror, Rounded, etc.) - click to apply
- Color: Set visualizer color. Check Gradient for 2-color gradient
- Direction / Bar count / Align / Sensitivity: Fine-tune direction, bar count, alignment, and sensitivity
Use Quick Position buttons to move the visualizer in one click.
Style Presets like "Neon Night", "Lo-fi Dream" apply complete visual themes.
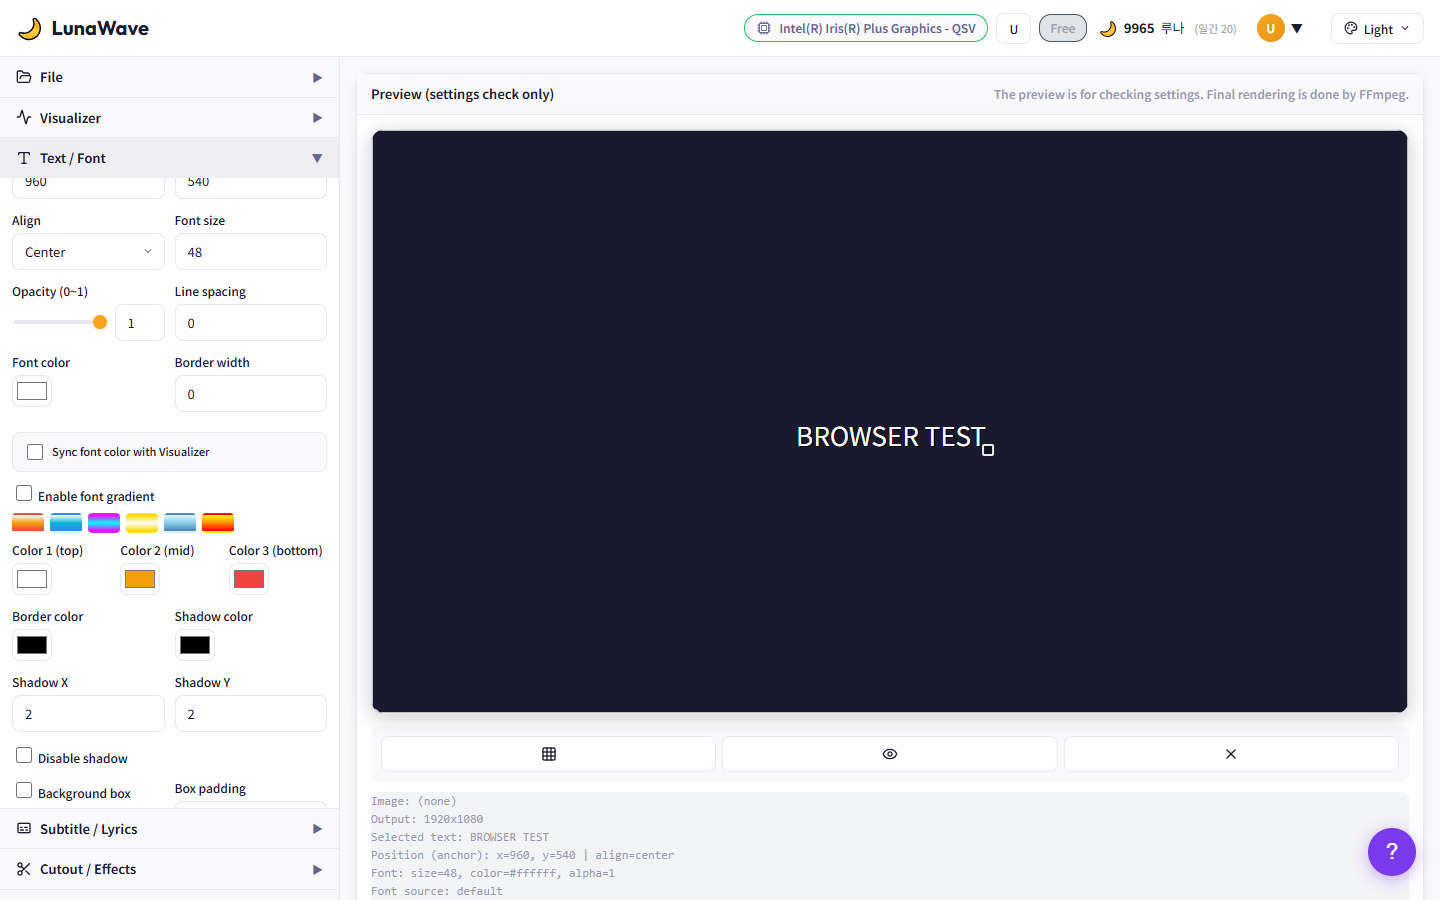
3.4 Text Edit
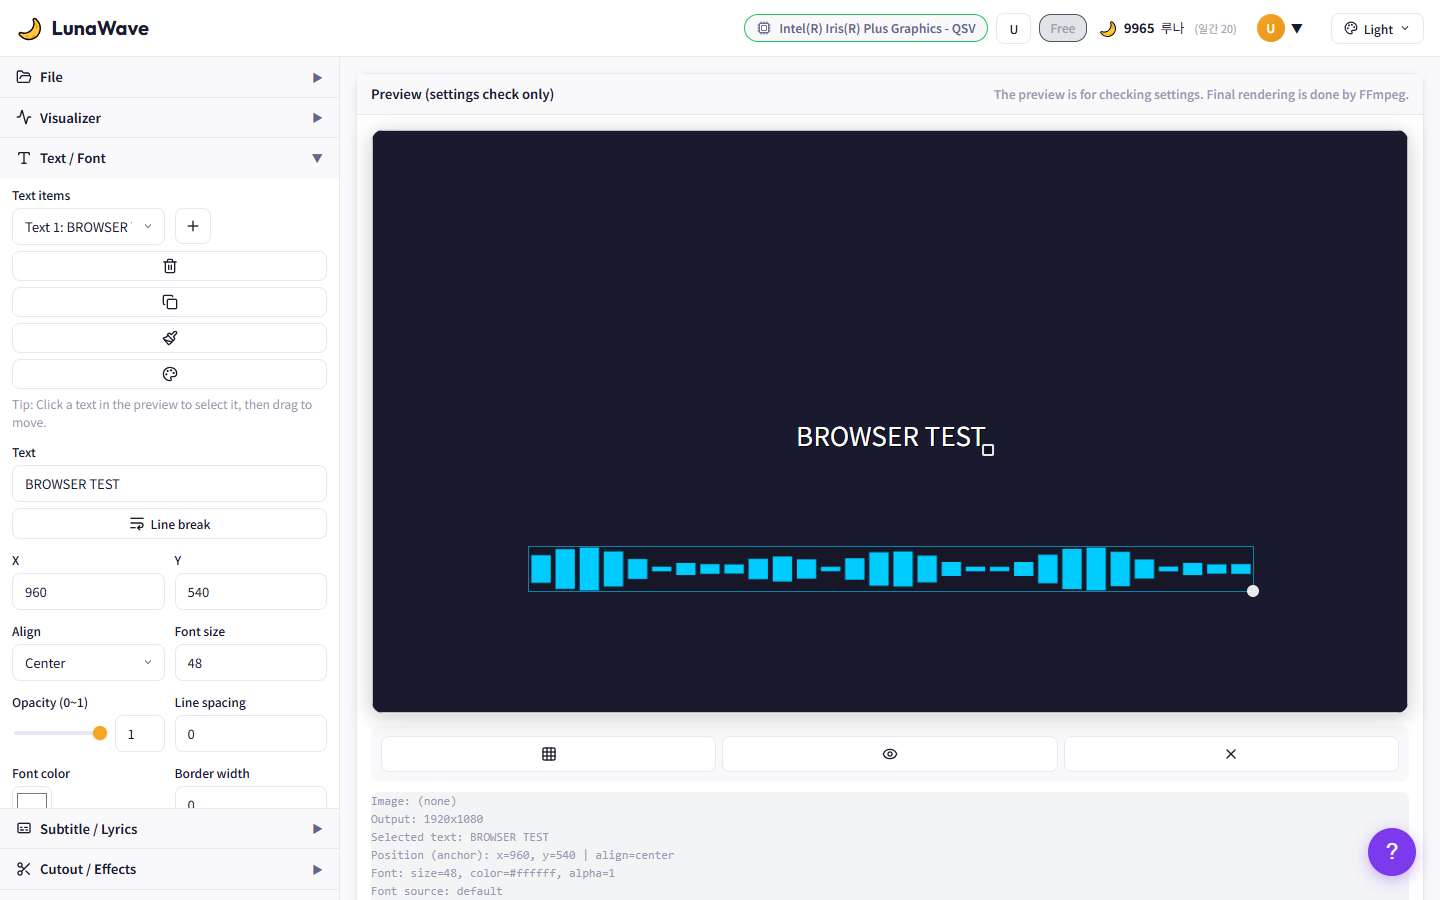
Text Edit Panel
- Text items: Add (+), delete, duplicate, copy/paste styles for multiple text layers
- Text input: Enter text. Use "Line break" button for new lines
- X / Y: Position in pixels. Also adjustable by dragging on preview
- Align / Font size / Opacity / Line spacing: Alignment, size, transparency, line spacing
Click text directly on the preview to select, drag to move.
Ctrl+Shift+C copies style, Ctrl+Shift+V pastes style to another text item.
3.5 Font
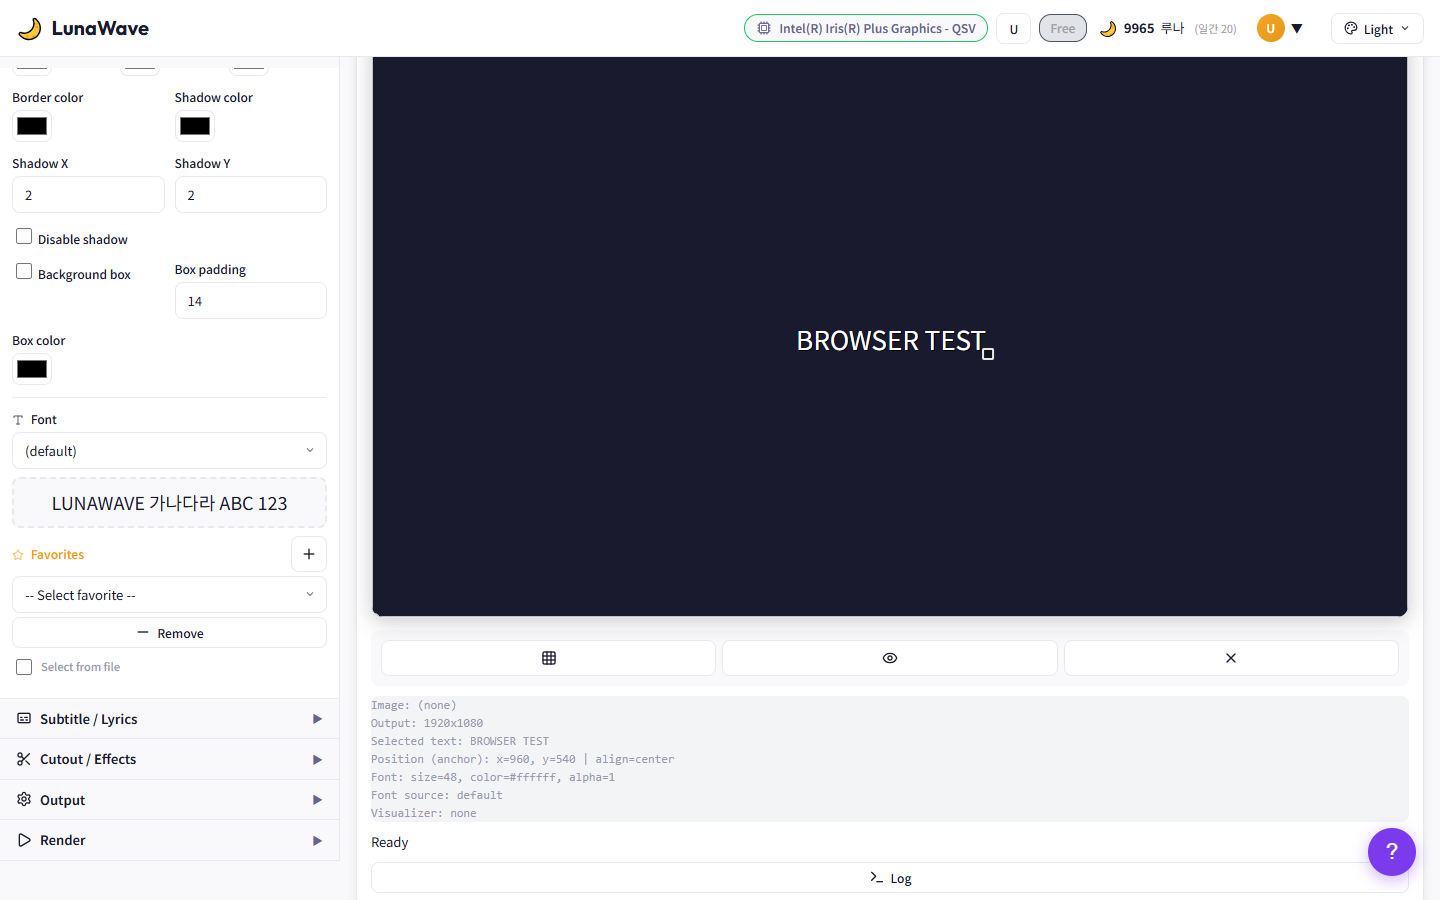
Font Selection Panel
- Font dropdown: Browse and select from system fonts
- Preview: Real-time sample text preview with selected font
- Favorites: Add fonts to favorites for quick access
- Select from file: Load TTF/OTF font files directly
For Korean fonts, use malgun (Malgun Gothic), gulim, or load a TTF file directly.
3.6 Color / Gradient
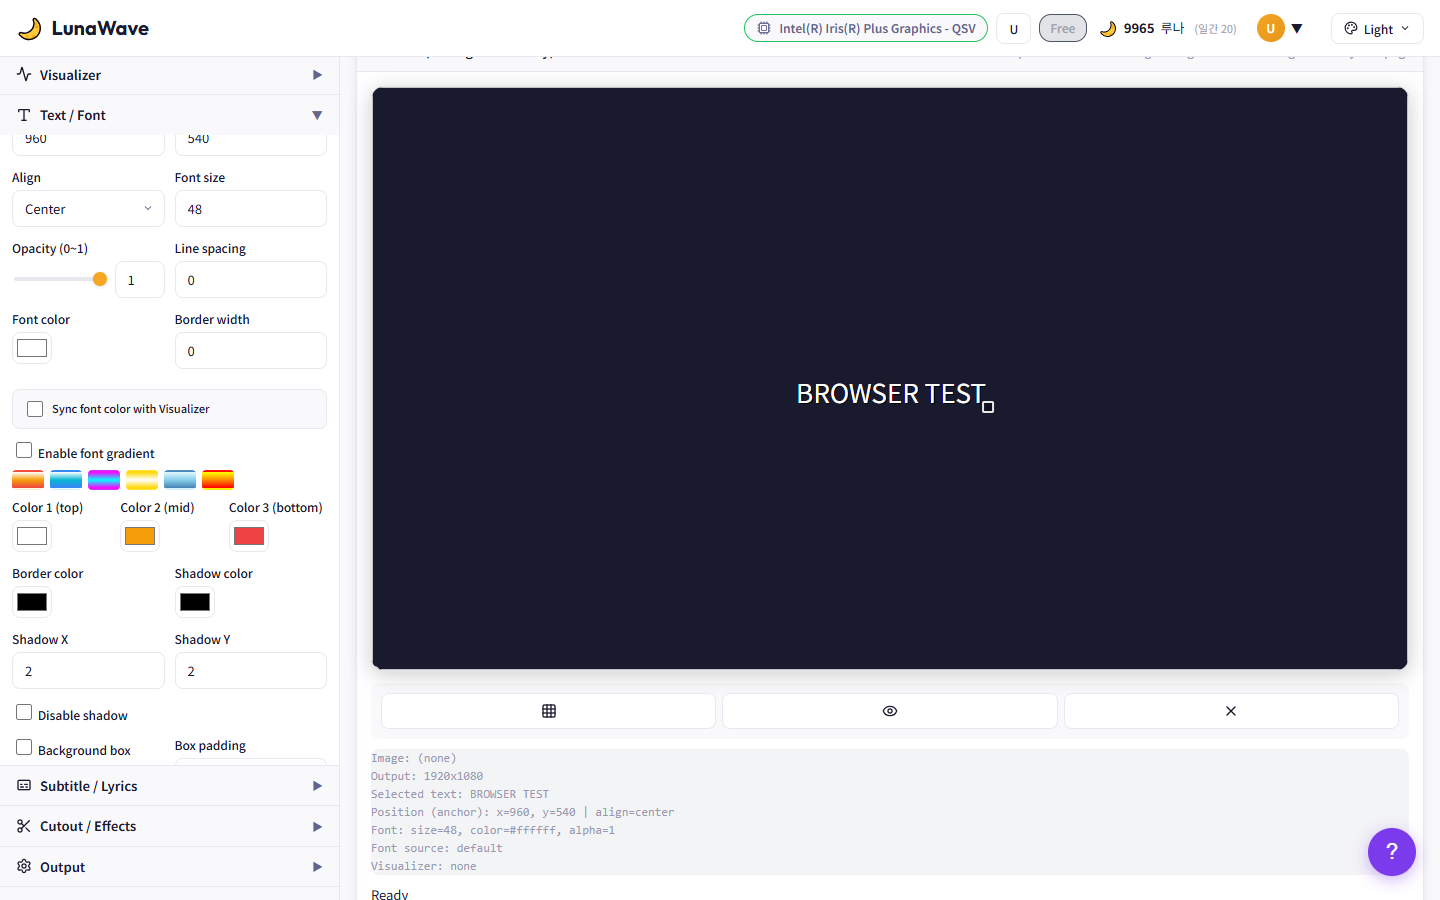
Color and Gradient Settings
- Font color: Set the base text color
- Enable font gradient: Check to apply vertical gradient
- Preset chips: Sunset, Ocean, Neon, Gold, etc. - click to apply
- Color 1 / 2 / 3: Manually set top, middle, bottom gradient colors
"Sync font color with Visualizer" automatically matches text and visualizer colors.
3.7 Subtitle / Lyrics
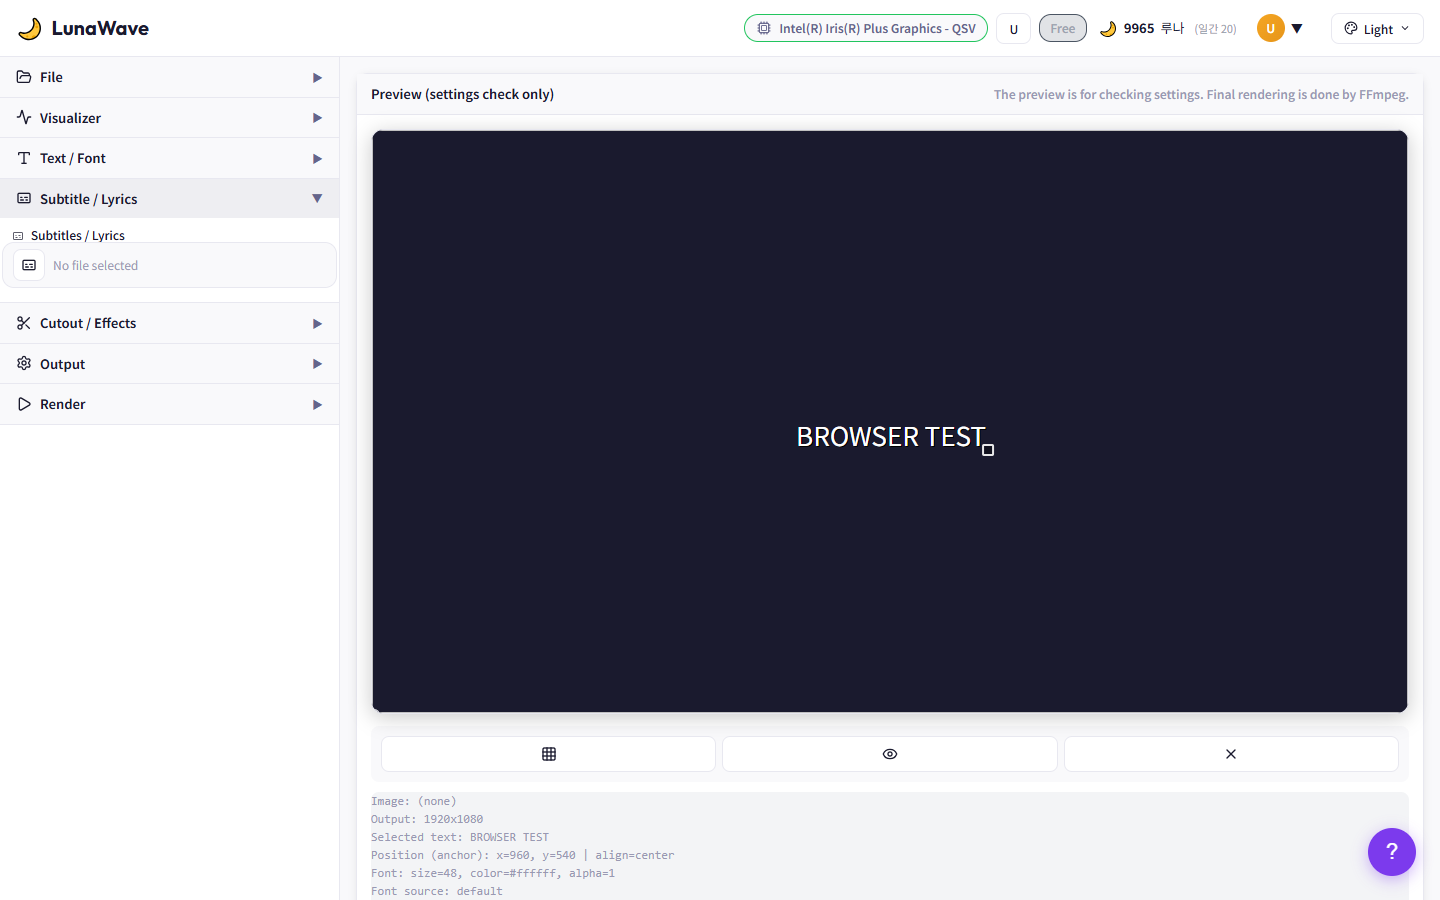
Subtitle / Lyrics Settings
- SRT file upload → Overlay subtitles on video
- Font size, Highlight style: None, Current Line, Karaoke Fill
- Offset slider: Fine-tune timing from -5s to +5s
If sync is off, adjust the Offset slider.
Only SRT format is supported for subtitle files.
3.8 Cutout / Effects
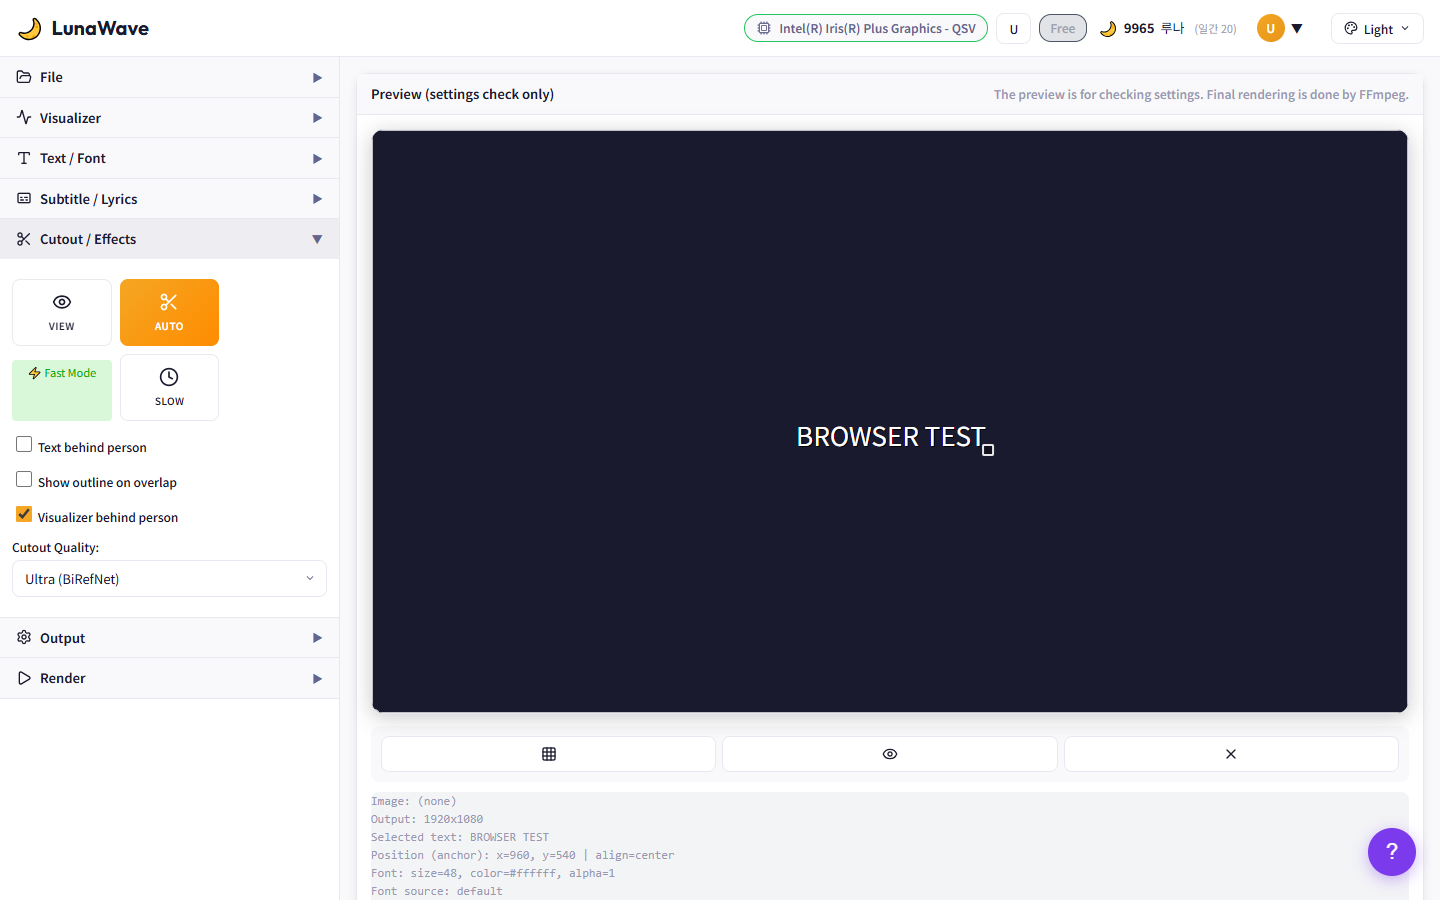
Cutout / Effects Panel
- Auto: AI automatic person extraction. Enable Fast Mode for quicker processing
- Slow: Higher quality cutout processing
- View: Preview the cutout result
- Text behind person: Place text behind the extracted person
"Ultra (BiRefNet)" provides the most precise cutout results.
Cutout is only available after uploading an image.
3.9 Output Settings
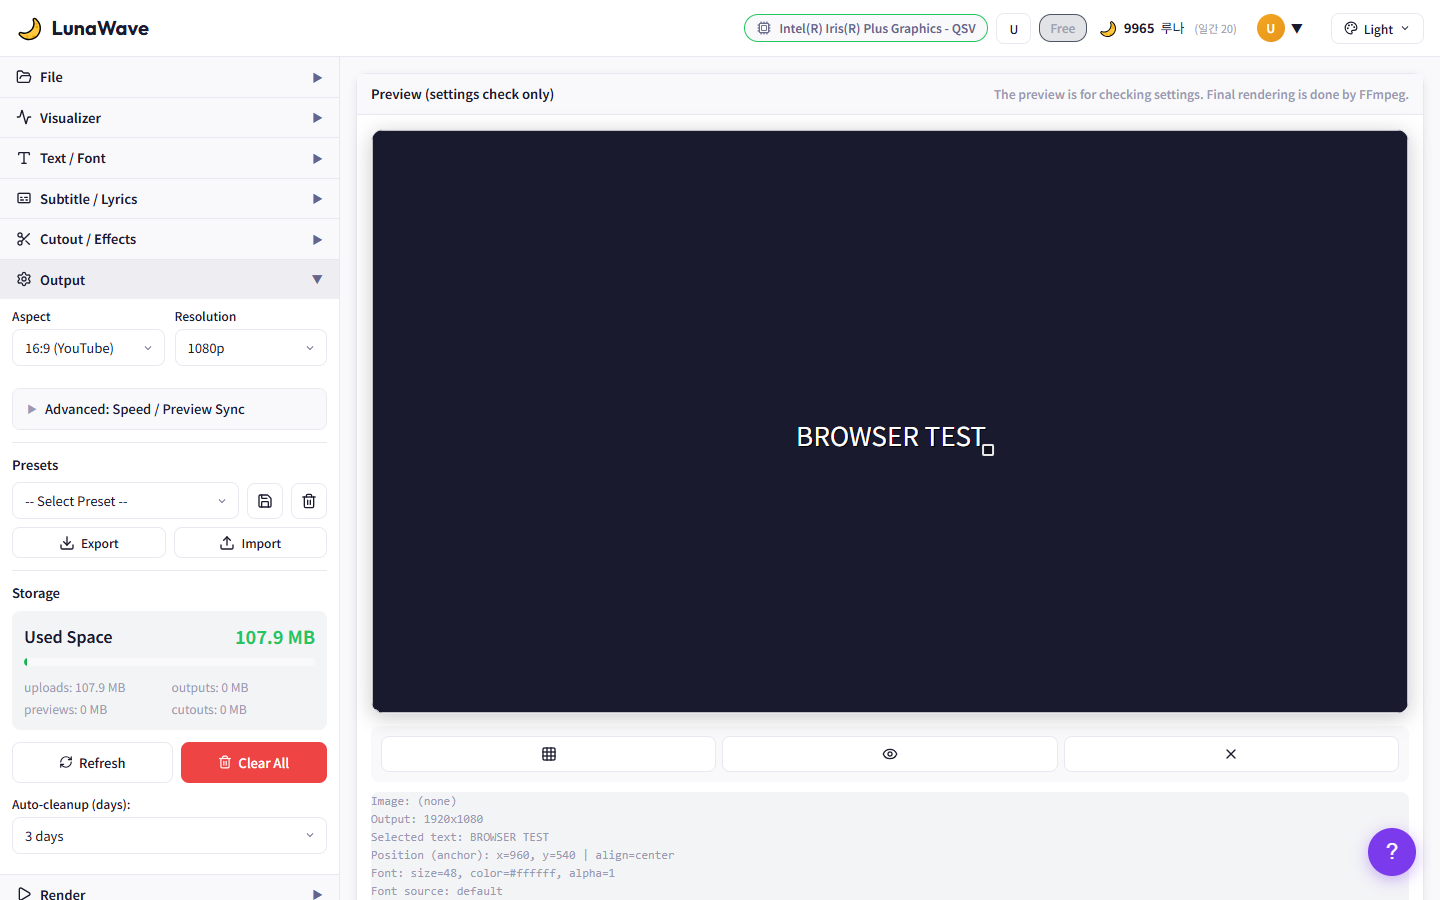
Output Settings Panel
- Aspect: 16:9 (YouTube) or 9:16 (Shorts)
- Resolution: 1080p or 720p
- Advanced: Encoder, quality preset, CRF, and other advanced settings
- Presets: Save setting presets, Export/Import for sharing
Auto encoder = GPU auto-detection. Best performance with NVIDIA.
Use the Storage panel to check disk usage and Clear All to clean up.
3.10 Render
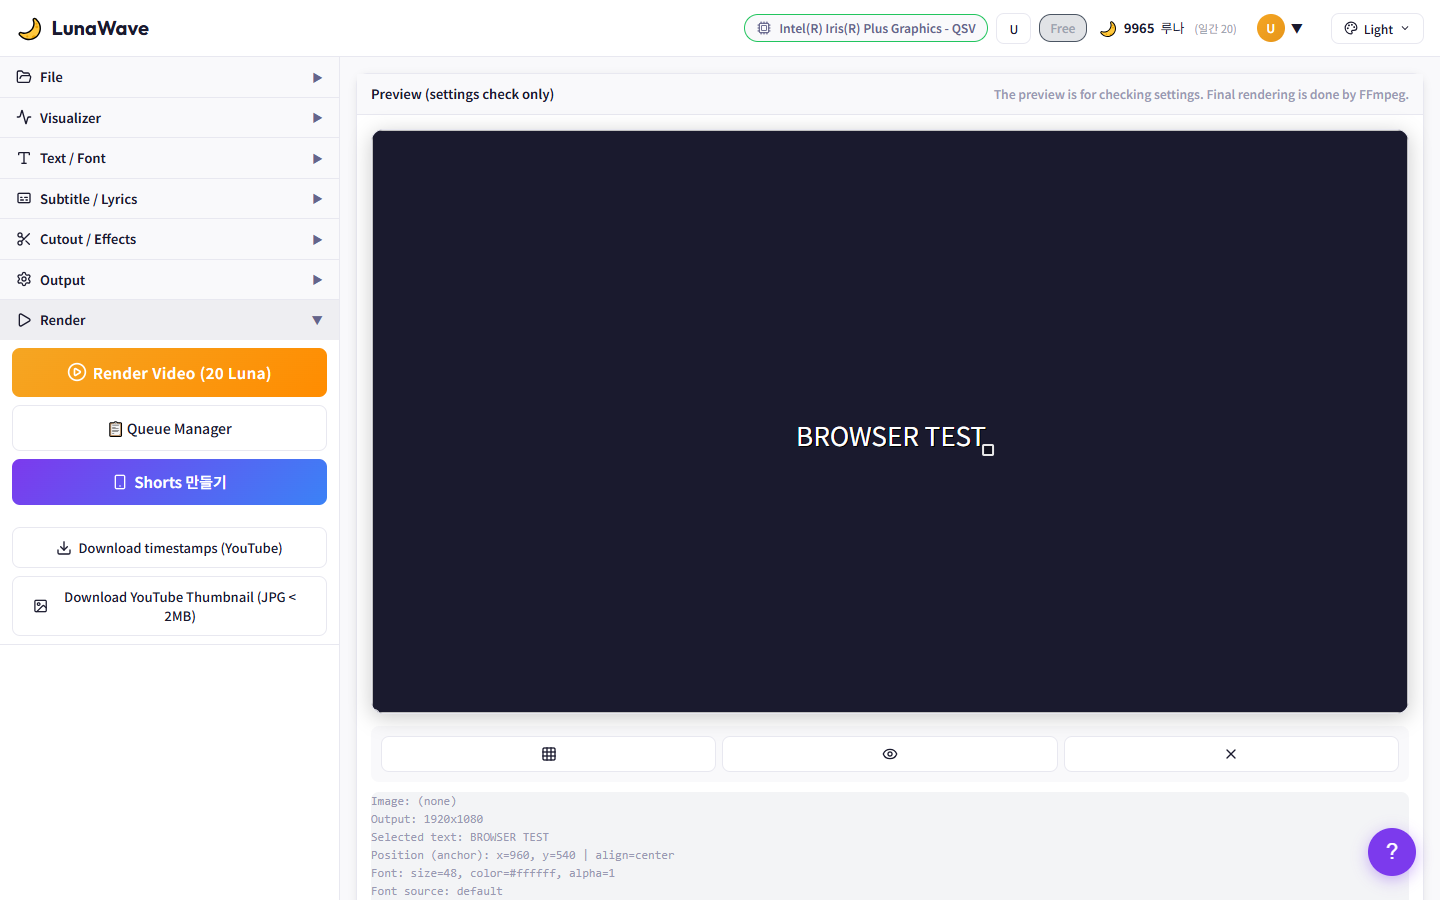
Render Execution Panel
- Render Video (20 Luna): Start final FFmpeg rendering
- Queue Manager: Process multiple videos in sequence
- Shorts: Dedicated 9:16 vertical video page
- Download timestamps: Download YouTube chapter timestamps
Do not close the browser during rendering. Progress will be lost.
3.11 Preview
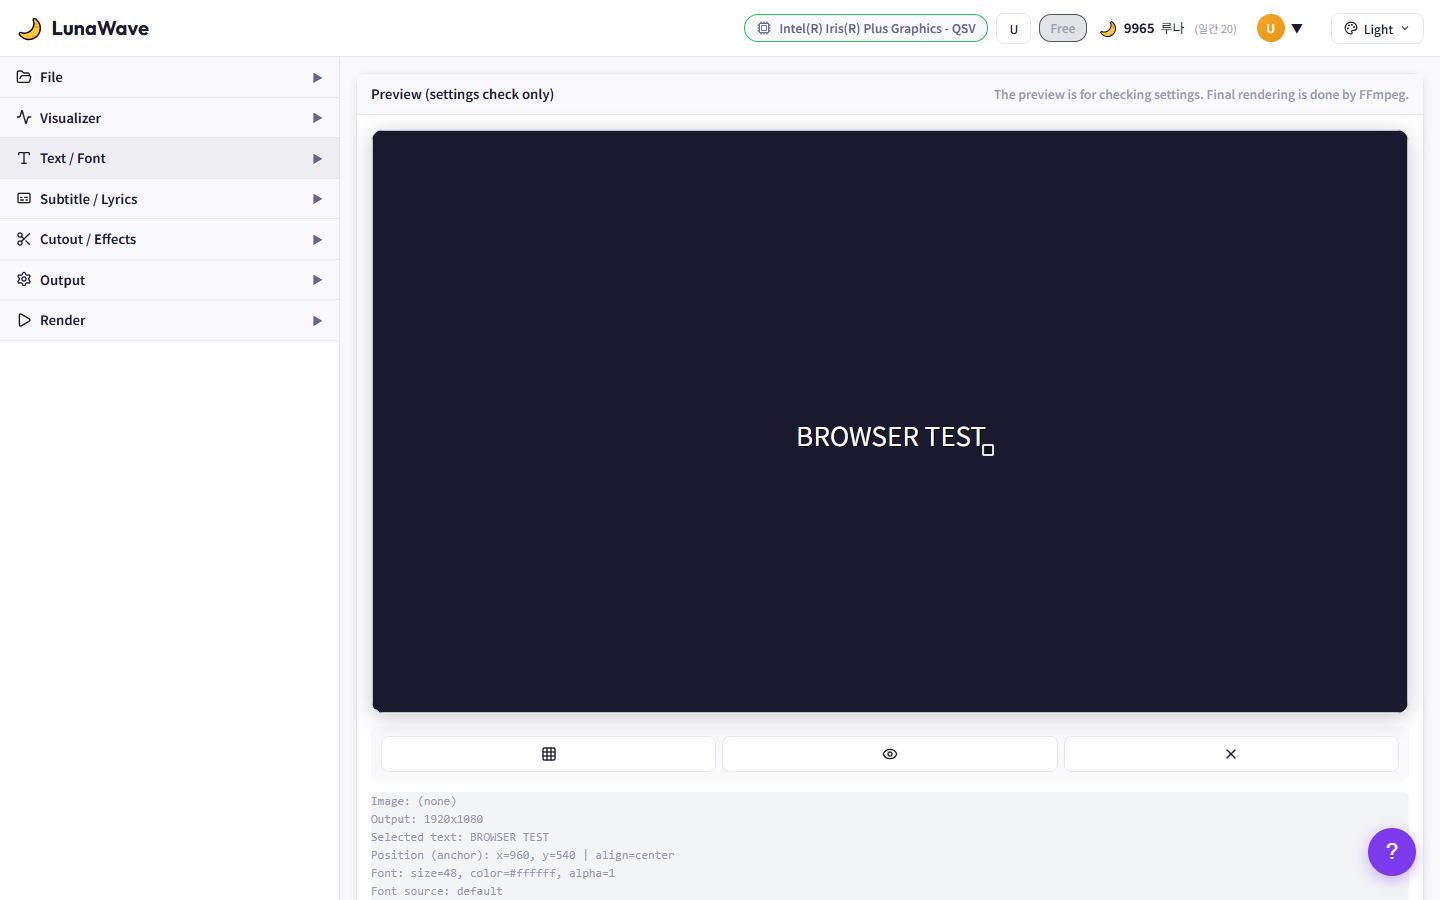
Preview Canvas and Controls
- Preview canvas: Real-time display of all applied settings
- Guide button: Toggle center line / rule-of-thirds guidelines
- Preview 3 Seconds: Generate a 3-second preview video
- Clear Preview: Reset the preview
Check image size, resolution, and font info in the meta information area.
Preview is for reference. Final FFmpeg output may differ slightly.
4 AI Lyrics Generator
AI가 장르, 무드, 스토리 기반으로 가사를 자동 생성합니다.
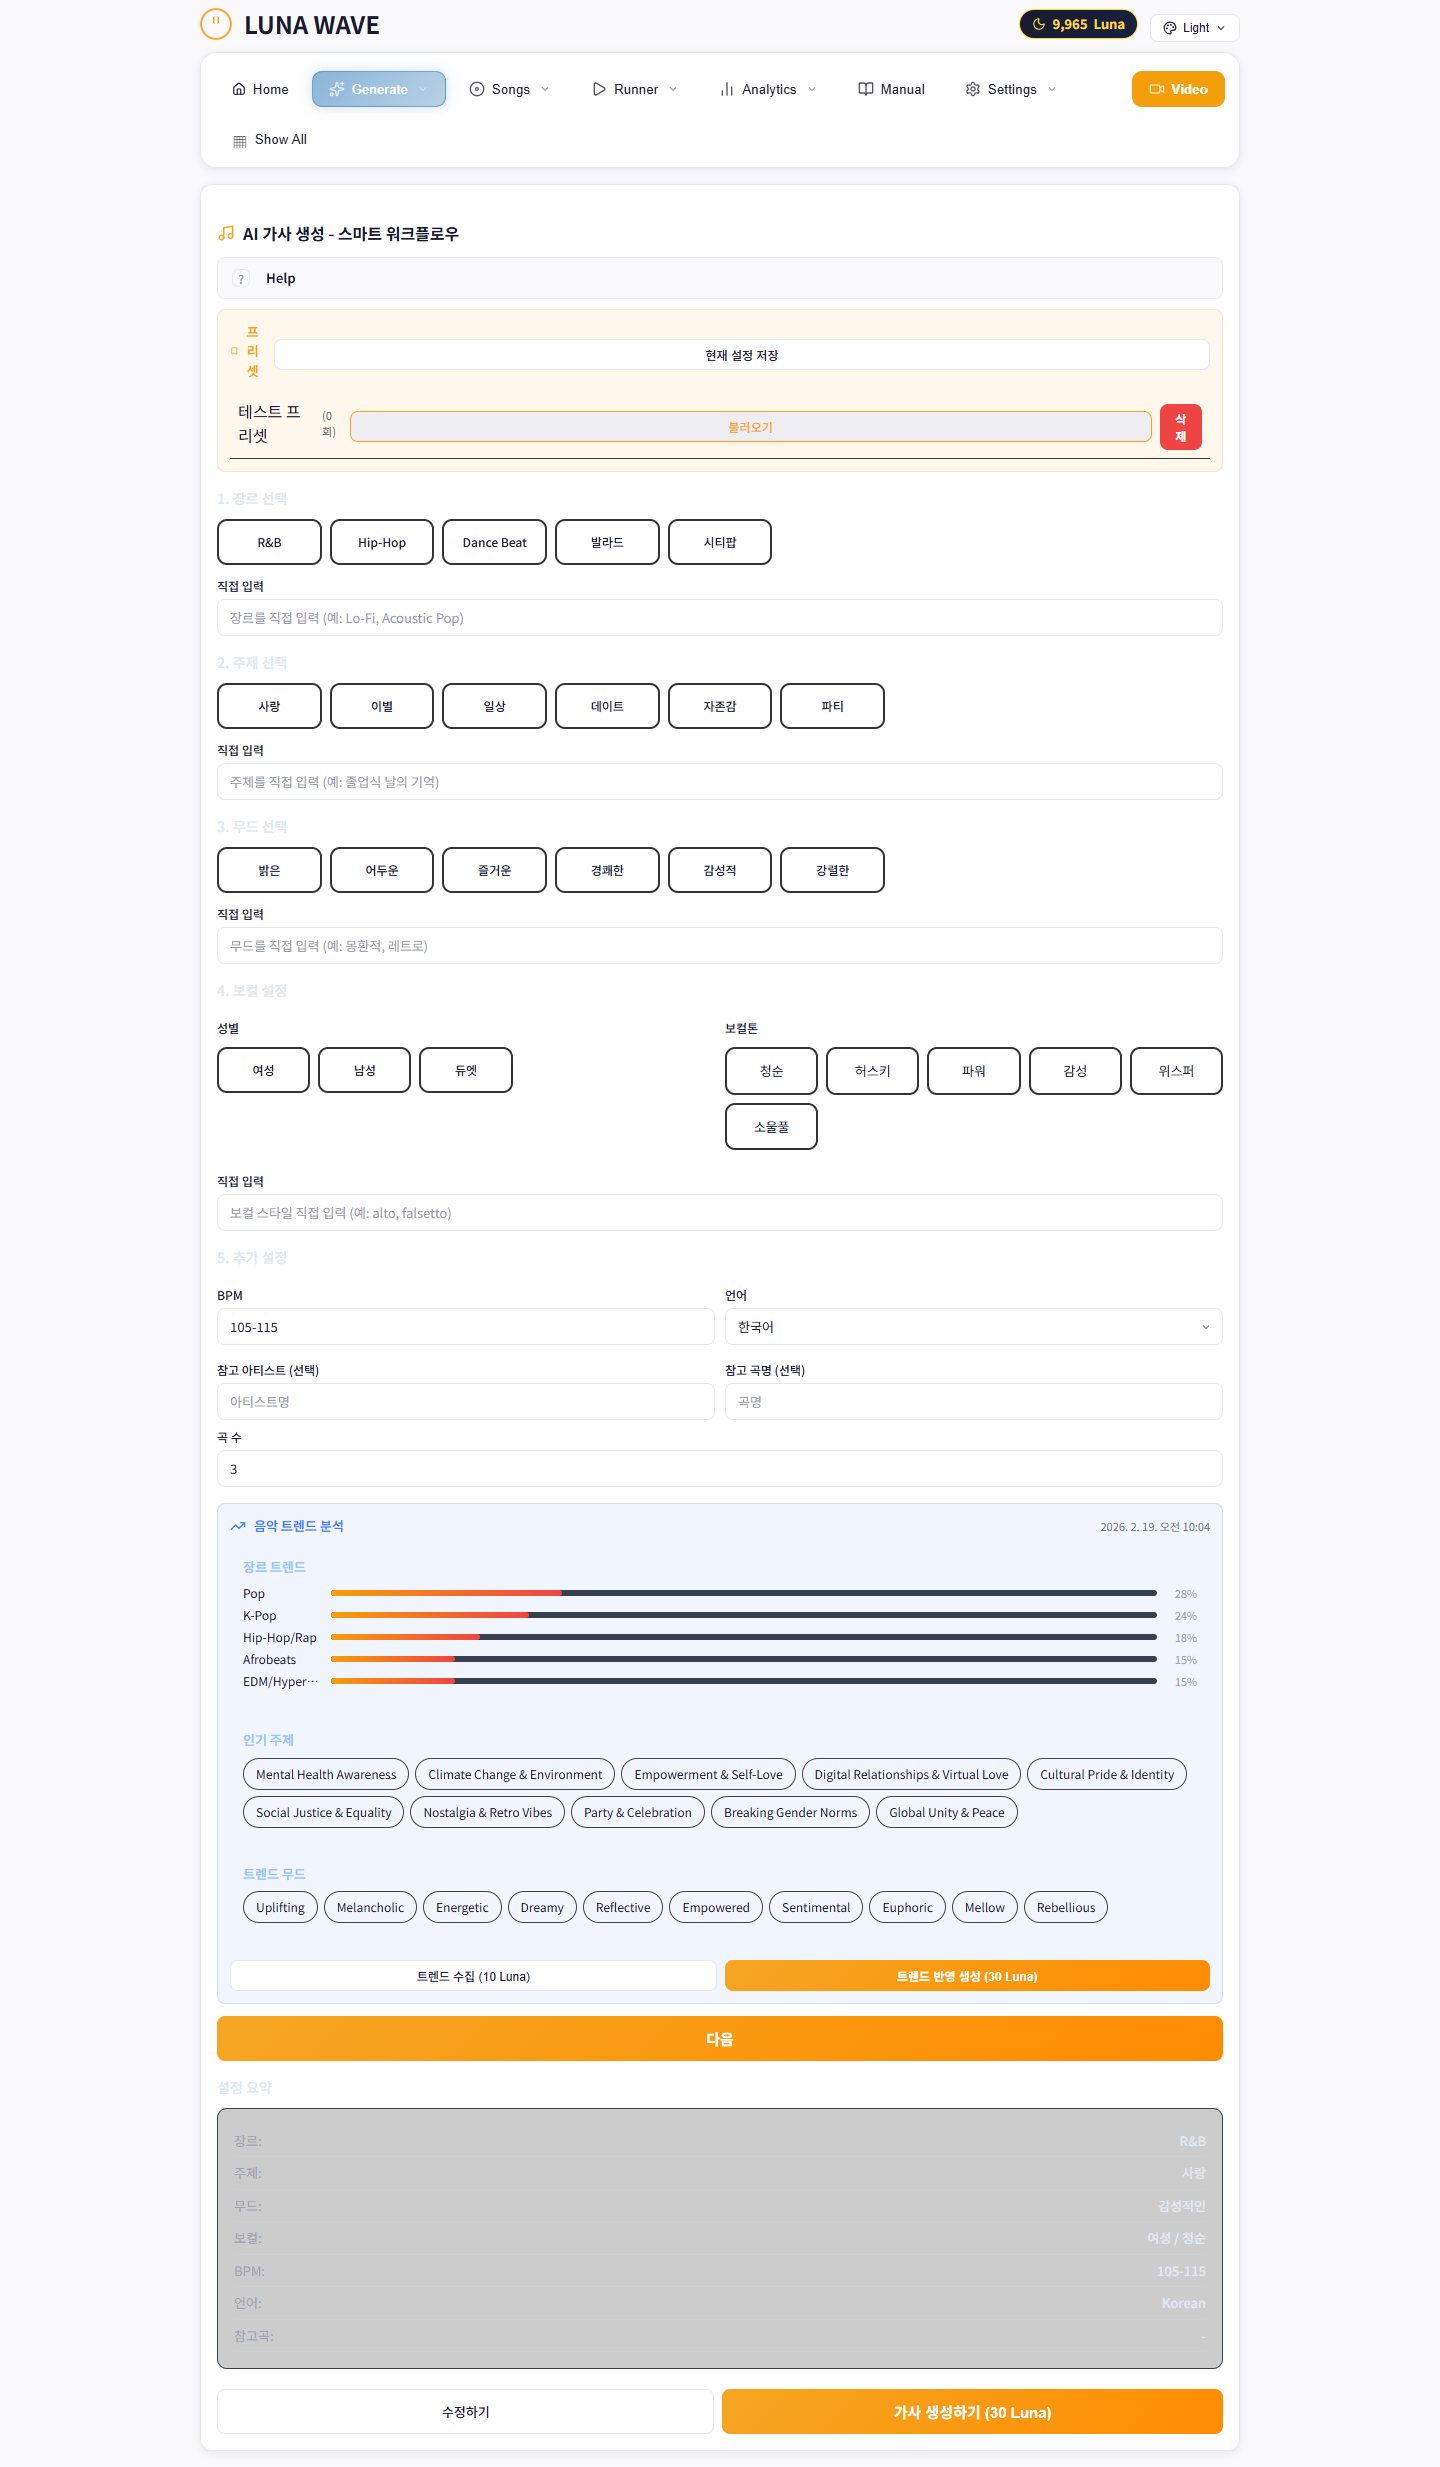
AI Lyrics Generation Tab
How to Use
- Generate tab → Genre/Mood select
- Enter Story or keywords
- Click Generate
- Review and edit generated lyrics
Features
- Story Bank: Save song ideas for later use
- Custom Genre/Mood: Add your own custom genre and mood tags
- Multiple Generations: Generate multiple variations and pick the best one
5 Song Management
Generated songs are managed in the Songs tab. Queue, edit, and organize your song library.
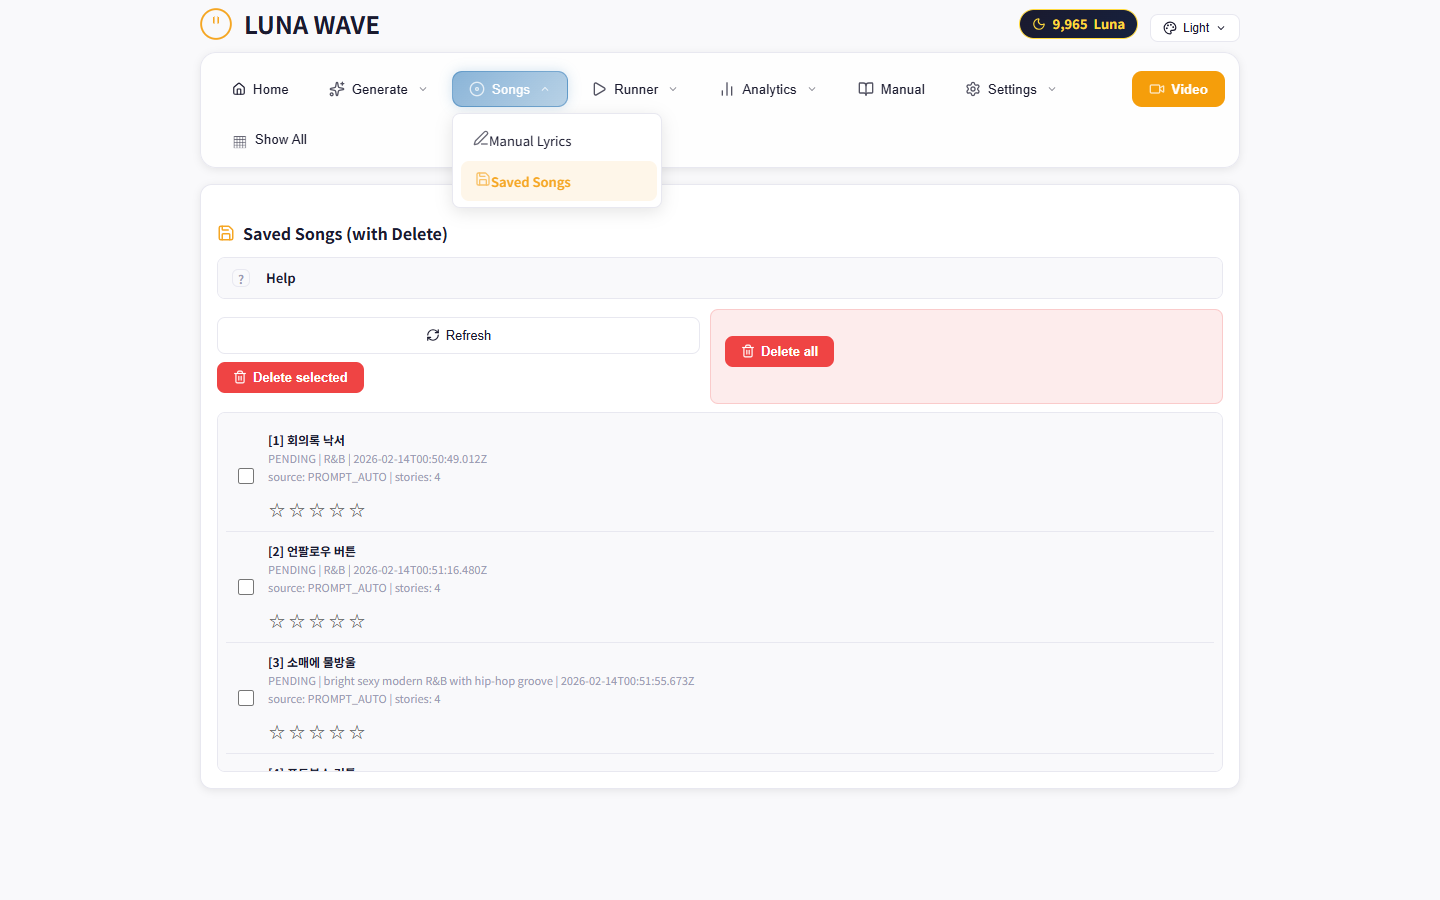
Song Management Tab
- View all generated songs in a list
- Edit lyrics, genre, mood, and title
- Queue management for auto runner
- Delete or archive songs
6 Auto Input Runner
Suno AI에 곡 정보를 자동으로 입력하는 자동화 도구입니다.
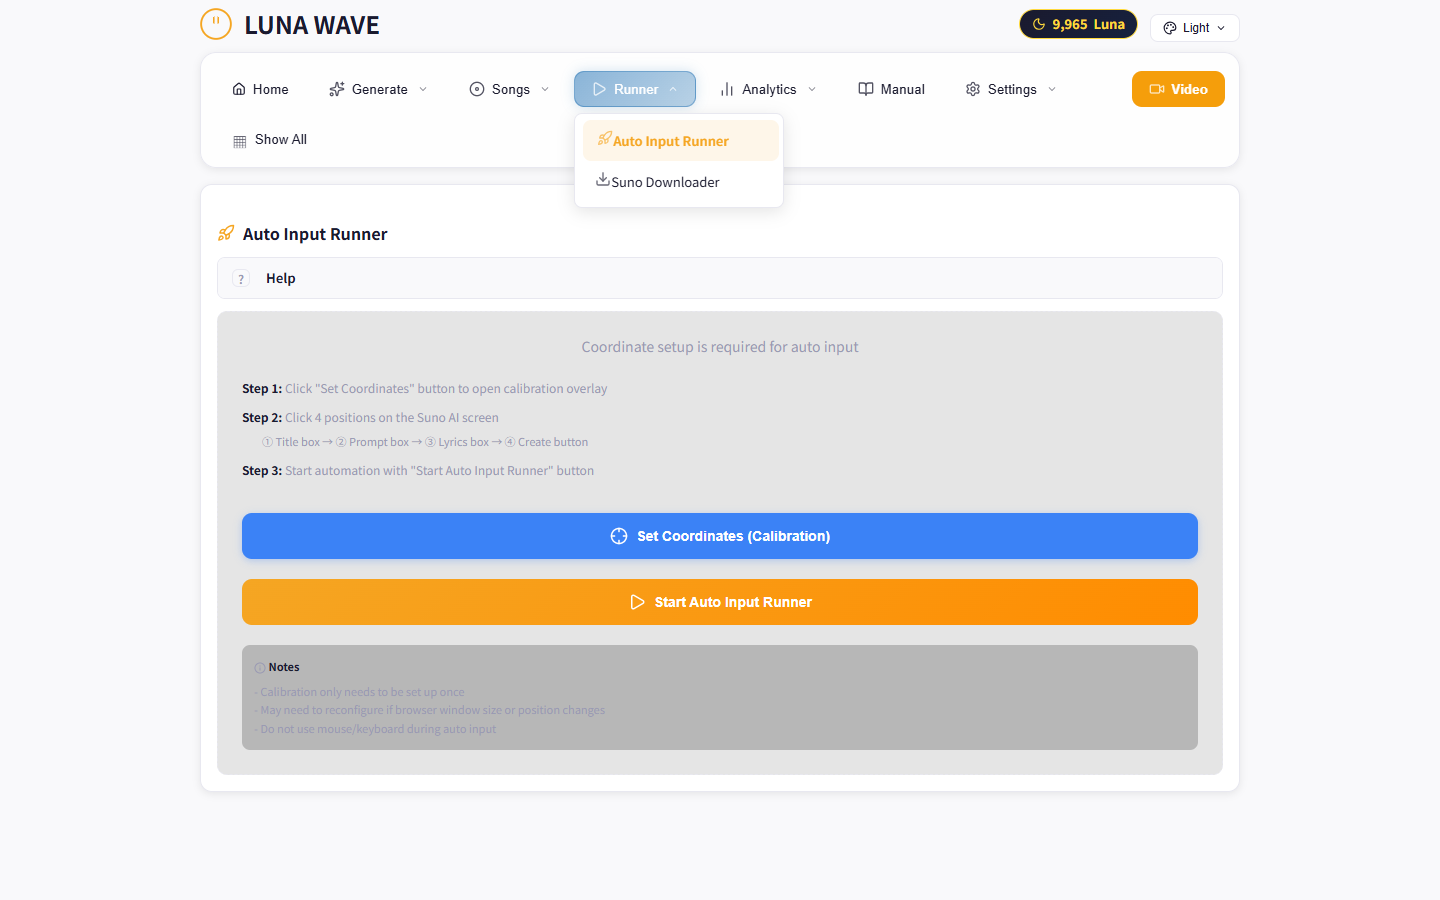
Auto Input Runner Tab
Calibration
Runner를 처음 사용하거나 Suno 레이아웃이 변경된 경우 캘리브레이션이 필요합니다.
- Calibration 버튼 클릭
- Suno 페이지에서 Title 입력 필드 클릭
- Prompt 입력 필드 클릭
- Lyrics 입력 필드 클릭
- Create 버튼 위치 클릭

Runner Calibration Detail
Queue Management
- Add Song: Add songs to the runner queue
- Edit / Remove: Modify or delete queue items
- Clear All: Remove all items from queue
- Import JSON: Bulk import from JSON file
- Sync: Sync with Songs tab
Execution
- Click Start Auto Input Runner
- Press F8 to begin automated input
- Press ESC to stop at any time

Runner Auto Mode in Action
Batch limit: 30-second pause every 10 songs to avoid rate limiting.
7 Suno Downloader
Suno AI에서 생성한 곡을 자동으로 다운로드합니다.
Auto Connect
- Click the Auto Connect button
- Browser opens → Log in to Suno
- Cookie is automatically collected
Download
- MP3 Download: Download audio files
- SRT Download: Download synchronized lyrics
- Select All: Batch download multiple songs
Connection issues? Make sure you are logged into Suno, then try reconnecting.
8 YouTube Metadata
AI가 YouTube 업로드에 최적화된 메타데이터를 자동 생성합니다.
- Title Candidates: 10 optimized title suggestions
- Description: SEO-optimized video description
- Tags: 30 relevant tags for discoverability
- Thumbnail Prompt: AI image prompt for thumbnail creation
9 Analytics
YouTube channel performance analysis and AI-powered insights.
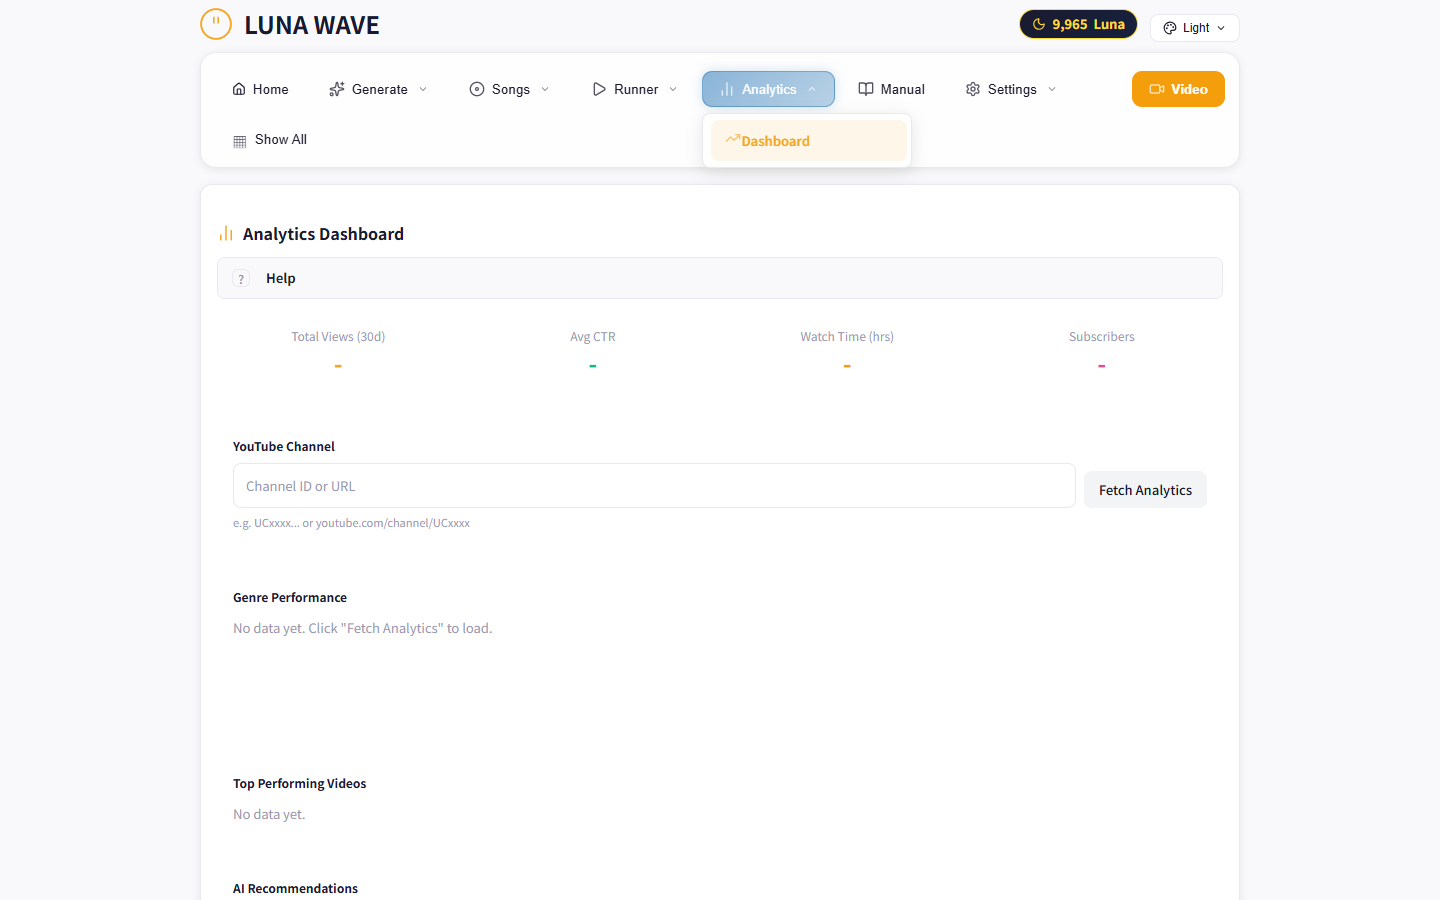
Analytics Dashboard
- Channel Analysis: Overall channel performance metrics
- AI Insights: AI-powered recommendations for growth
- Competitor Compare: Compare your channel with competitors
- Timing Analysis: Best upload times for your audience
- Find Competitors: Discover channels in your niche
10 Settings
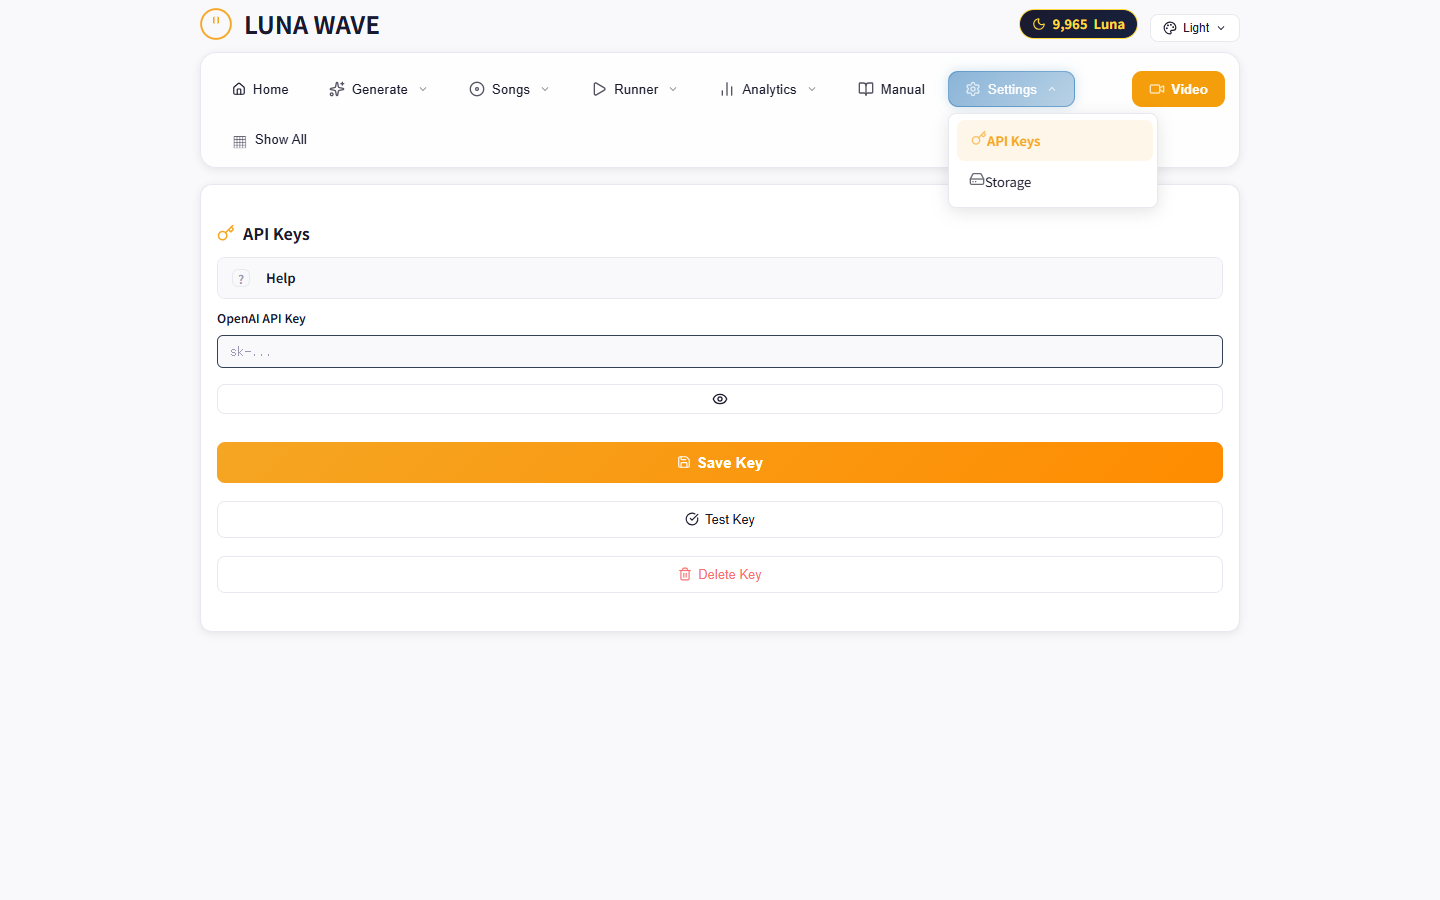
Settings Page
- Theme: Switch between Light and Dark mode
- Output Folder: Set the default output directory for rendered videos
- Language: Interface language selection
- API Keys: Configure AI provider API keys
11 Keyboard Shortcuts
| Shortcut | Action |
|---|---|
ESC |
Stop Auto Runner / Cancel calibration |
Ctrl + Click |
Select text on canvas |
Drag |
Move text / visualizer position on canvas |
Ctrl + Shift + C |
Copy text style |
Ctrl + Shift + V |
Paste text style |
F8 |
Start Auto Runner (after engine is running) |
12 Troubleshooting
| Issue | Solution |
|---|---|
| App does not start | Check if localhost:3000 is in use by another app. Check firewall settings. |
| Rendering is slow | Ensure NVIDIA GPU is detected. Update GPU drivers to the latest version. |
| Performance drops over time | Check CPU temperature and ventilation. Close unnecessary background apps. |
| Cutout not working | Verify the Cutout server is running. Restart the app if needed. |
| Canvas differs from FFmpeg output | Use "Accurate Preview" or "Preview 3 Seconds" to verify. |
| Suno connection failed | Check login status on Suno. Try reconnecting via Auto Connect. |
| Visualizer not visible | Make sure audio is uploaded and a visualizer preset is selected. |